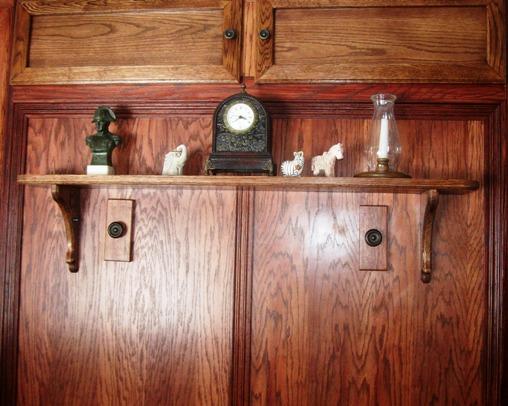
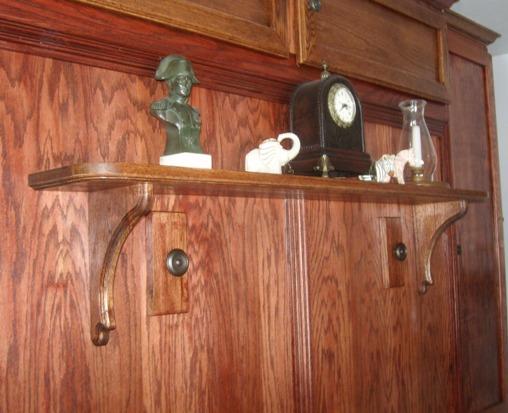
How To Make A Simple Wood Shelf
With the right plans, materials, and equipment, you can build this
Simple Wood Shelf, as shown here.


Materials
- 1" x 8" x 12" Material/Hard Wood of Choice (Oak Recommended): One Piece for the Corbels
- 1" x 8" x 48" Material/Hard Wood of Choice (Oak Recommended): One Piece for the Shelf
- 1 1/2" Wood Screws; 1/4 lb.
- 1 1/4" Pocket Screws (Fine Thread); 1/4 lb.
- Sandpaper
- Wood Filler and Glue
- Polyurethane Poly

Tools
- Table Saw
- Tape Measure
- Pencil
- Miter Saw
- Band Saw
- Pocket Hole System
- Belt Sander
- Palm Sander
- Router w/desired bit
- Power Drill with DeWalt 9/64 Tapered Bit with Plug Cutter
- Level
- Screw Gun
- Two Gripping Clamps


Step 1: Cut the Corbel Pieces - Determine the desired size of the Shelf
and Brackets/Corbels
- Select the 1" x 8" x 12" (Picture above shows a 1 x 10) Material: Make a desired corbel
pattern or use the dimensions provided above and transfer the design to your material
- Select the material w/image: Using a Band Saw, cutout the Corbel
- Select the Corbel: Using a Sander, sand the Corbel, as shown above
- Select the Corbel: Using a Router and desired Bit, router the facing edge
(do not router the back and top edges)
- Select the Corbel; Using the Pocket-hole System, drill a Pocket Hole along the inside edge
to receive a screw to connect it to the wall
- Sand the Corbel
- Repeat this process for the other Corbel

Step 2: Cut the Shelf Piece - Determine the desired size of the Shelf
- Select the 1" x 8" x 48" Material: Scribe a 2" radius on each of the two, front corners
- Select the material w/radius drawn: Using a Band Saw, cut the two, front corners to round
them
- Select the Shelf: Using a Router and desired Bit, router the facing edge and two sides
(do not router the back edge - I did not router the Top Edge, only the Bottom)
- Determine the placement of your shelf and the manner in which you will hang it;
I used the Poket-Hole System as I hung my shelf on a wood wall panel; Using a level, scribe a
line on the wall to represent the length/placement of your shelf
- Determine the placement of the Pocket Holes; Mark the hole placement along the top,
back edge of the shelf and drill the holes
- Select the Shelf: Using a Palm Sander and hand sander, sand the Shelf material


Step 3: Assemble the Shelf - Select the Shelf Pieces
- Select the Shelf and two, Corbel Pieces; Determine the placement of the corbels and mark
the placement of them on the top and bottom surface of the shelf (use a light pencil mark or
tape); Using a drill and 9/64" bit, from the top, drill two, counter-sunk holes in from each
edge to receive the screws to attach the corbels
- Using Glue and 2" screws, connect the pieces, as shown above
- Complete all finish sanding
- Apply desired stain/paint and/or Poly


Copyright 2013 - Wayne Murray
If you are a member of a non-profit organization and have any requests or suggestions
regarding projects for your group, you can send Rod an email at: rodneyg@cheqnet.net
|


