Materials
- 3/4" Plywood 48" x 96" Hardwood of choice: Two pieces for the Top, Sides, Bottom, Drawers,
and Glide Supports
- 3/4" Thick x 12" x 96" Hardwood: One piece for the "finished" Drawer Fronts
- 3/4" Thick x 3" x 96" Hardwood: One piece for the Top Frame
- 3/4" Thick x 2" x 96" Hardwood: Three pieces for the Face Frame
- 3/4" Thick x 5" x 96" Hardwood: One piece for the Drawer Dividers
- 1/4" Plywood 48" x 96": Two pieces for the Drawer Bottoms and the Back Panel
- 1 1/4" Wood Screws: 1/4 lb.
- 1/2" Wood Screws: 1/8 lb.
- 1 1/4" Kreg Screws: 1/4 lb.
- Sandpaper
- Wood Filler and Glue
- Satin Finish Polyurethane Poly
Tools
- Table Saw
- Belt Sander or 120 grit sandpaper and a block (320 grit for finish sanding)
- Tape Measure
- Pencil
- Corner/Arc Template
- Miter Saw
- Band Saw
- Power Drill with DeWalt 9/64 Tapered Bit with Plug Cutter
- Router with Round-over Bit
- Kreg Pocket Hole System
- Screw Gun
- Two Clamps: Bar Clamps and a Gripping Clamp
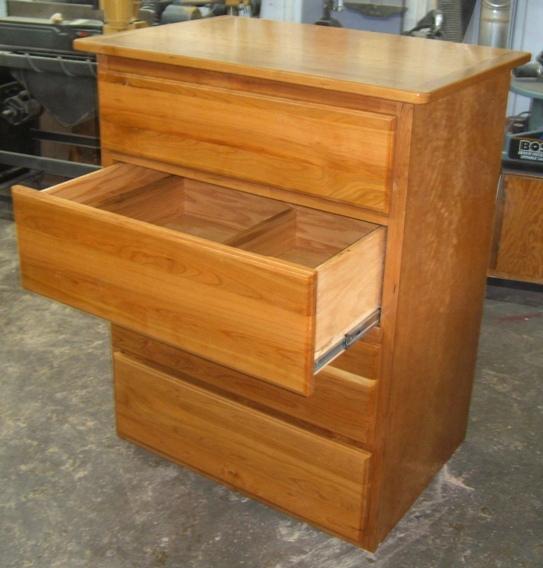
Step 1: Cut the Dresser Box Pieces - Determine the desired size of your dresser or use the
dimensions provided here
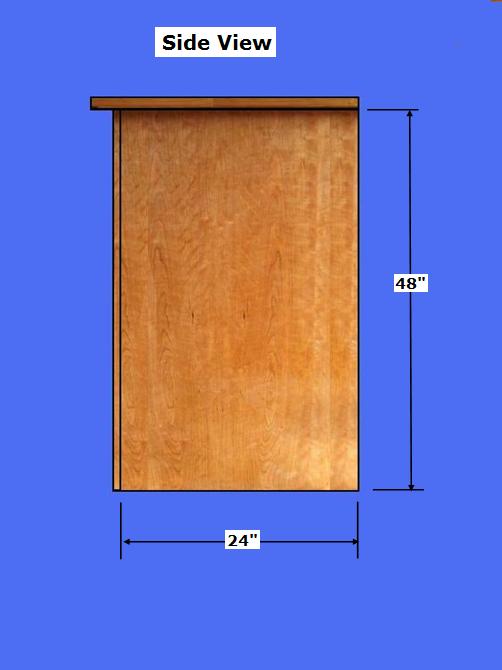
- Select the 3/4" Plywood stock: Rip one piece in half to 24" (23 7/8") and crosscut the
24" x 96" in half to make the two Sides @ 48" (47 7/8"); using the other half (24 x 96), cut the Bottom Panel @
24" x 34 1/2"; see the diagrams above.
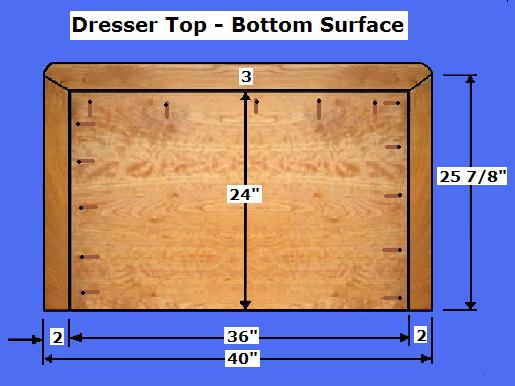
- Select the 3/4" Plywood stock: Cut one piece @ 24" x 36" for the Top Panel
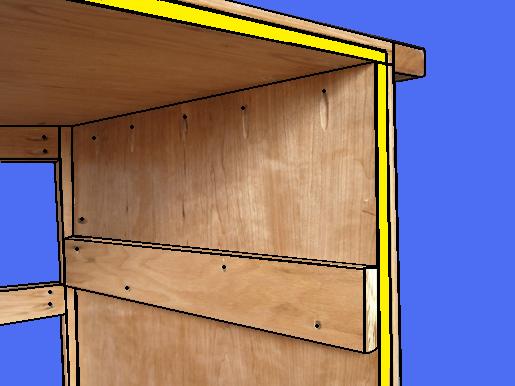
- Select the Top, Bottom, and Side Panels; On the back edge, make a daddo cut 1/4" deep by
1/2" to receive the 1/4" thick Back Panel
- Select the 3" Hardwood stock: Cut one piece @ 42" for the Top Panel Frame (Front); Cut the
ends @ 45 degrees
- Select the 2" Hardwood stock: Cut two pieces @ 25 7/8" for the Top Panel Frame (Sides);
Cut one end of each @ 45 degrees, as shown above
- Select the Top, Bottom, and Side Panels; Drill pocket holes along the edges of the panels
as shown above (Ensure to drill the holes to attach the Front Frame)
- Select the 3/4" Plywood stock: Cut eight pieces @ 2 7/8" x 23.5" for the Slide Supports

Step 2: Make the Dresser Box - Select the pieces from Step 1
- Select the four pieces that make up the Top Panel; Using glue, Kreg them together; Using a
Band Saw, round the two, "front" corners; Using a Router with Roundover Bit, round off the top and bottom edges
of the Front and Sides (NOT the "Back Edge"); Sand smooth
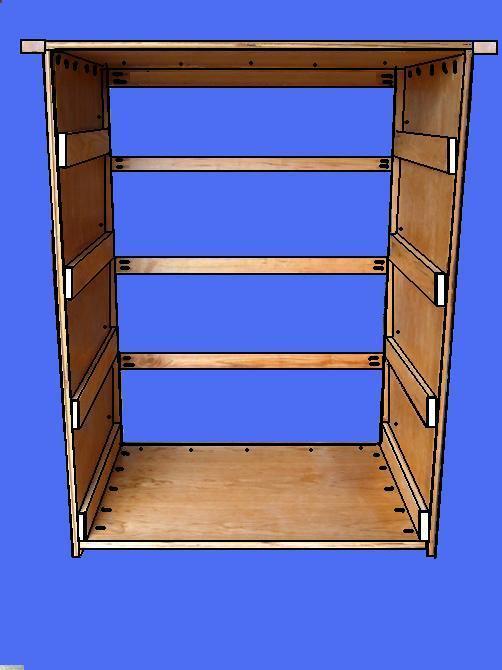
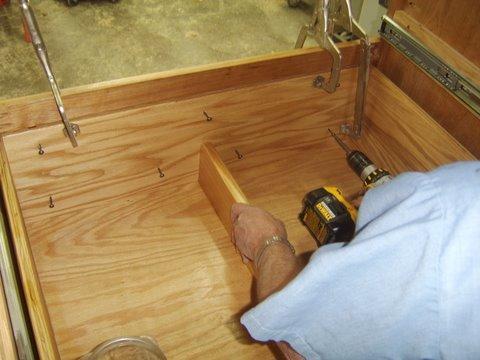
- Select the two, Side Panels and the eight Slide Supports; Using glue and 1 1/4" screws,
attach the supports to the two Side Panels, per the dimensions above (countersink the screws)
- Select the Top, two Sides and Bottom Panels; Using glue, Kreg them together; Notice the 2"
placement of the Bottom Panel
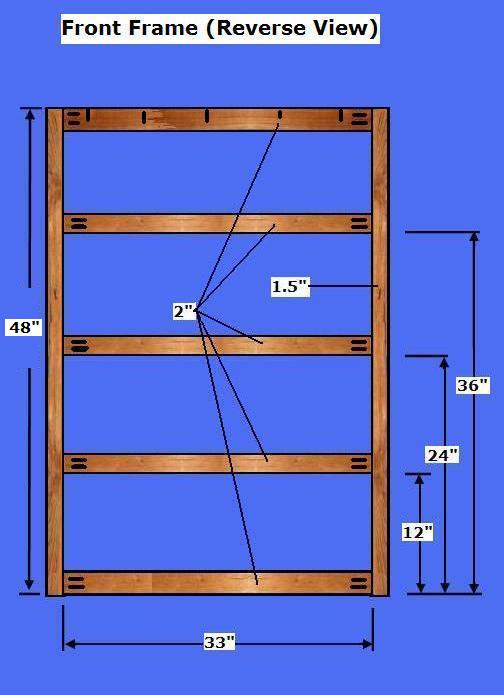
Step 3: Construct and Attach Front Frame - Select the 2" Hardwood Material
- Select the 2" material; Cut two pieces @ 1.5" x 48"
- Select the 2" material; Cut five pieces @ 2" x 33"
- Select the cut pieces; Drill the pocket holes, as shown above; sand all pieces
- Select the pieces; Using glue and pocket hole screws, connect the pieces
- Select the Front Frame; Using glue and pocket hole screws, connect the Frame to the Cabinet

Step 4: Construct the Drawers - Select the Plywood and Hardwood Materials
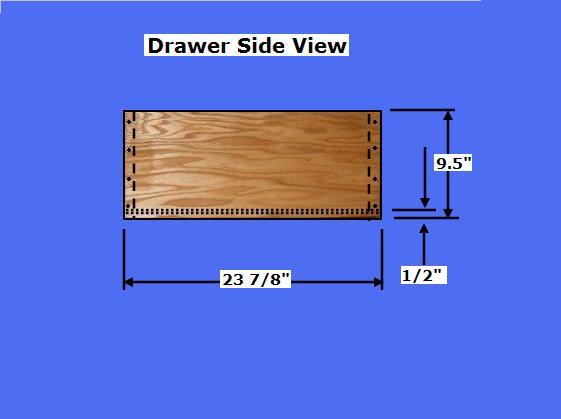
- Select the 3/4" Plywood; Cut the Front and Back Panels for the three larger drawers,
6 pieces @ 9.5" x 30.5"; Cut a 1/4" daddo slot 3/8" deep to receive the 1/4" Bottom Panel
- Select the 3/4" Plywood; Cut the Side Panels for the three larger drawers, 6 pieces @
9.5" x 23 7/8"; Cut a 1/4" daddo slot 3/8" deep to receive the 1/4" Bottom Panel
- Select the 3/4" Plywood; Cut the Front and Back Panels for the smaller, top drawer,
2 pieces @ 7" x 30.5"; Cut a 1/4" daddo slot 3/8" deep to receive the 1/4" Bottom Panel
- Select the 3/4" Plywood; Cut the Side Panels for the smaller, top drawer, 2 pieces
@ 7" x 23 7/8"; Cut a 1/4" daddo slot 3/8" deep to receive the 1/4" Bottom Panel
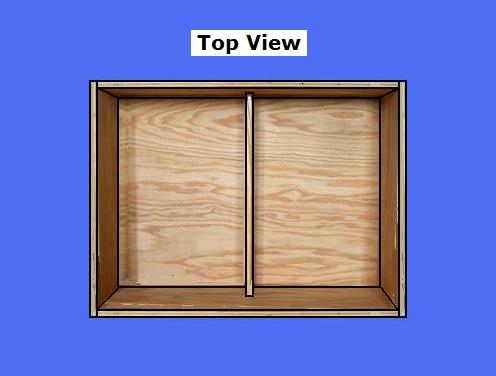
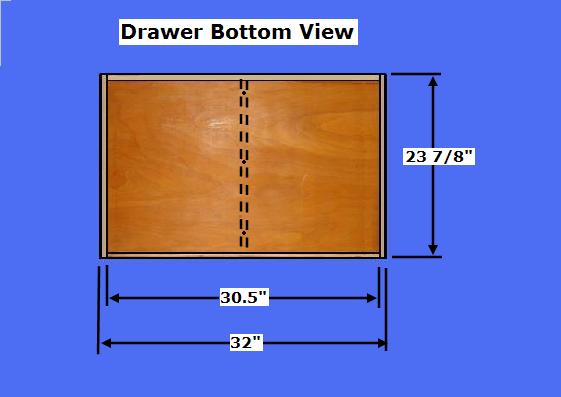
- Select the Front and Back Panels; Drill two holes in each panel, on center (counter sink
holes), to receive the Drawer Center Divider
- Select the Side Panels; Drill 3 holes (counter sink holes) on each edge
- Select the 1/4" Plywood Material; Cut 4 Bottom Panels @ 31 1/4" x 23 1/8" (dry-fit drawers
one panel and confirm measurement before cutting the other three Bottom Panels)
- Select the 3/4" Hardwood Material; Cut 4 Center Dividers @ 4.5" x 22 3/8"
- Select all pieces; Sand all pieces
- Select all pieces; Using glue and 1 1/4" screws, construct all drawers
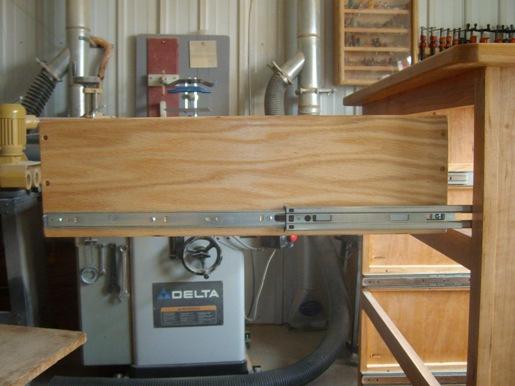
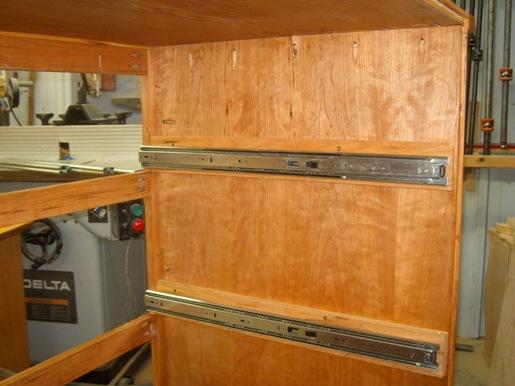
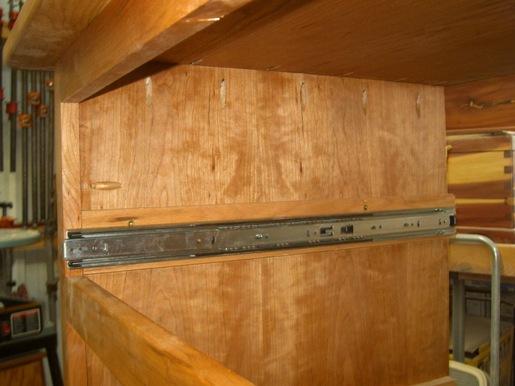
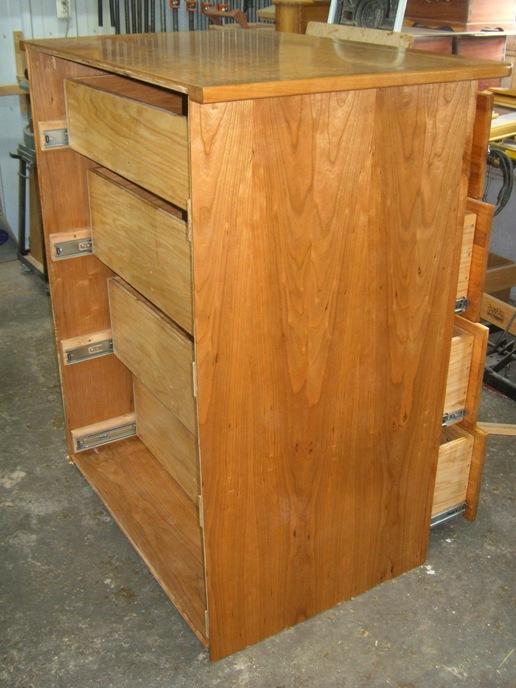
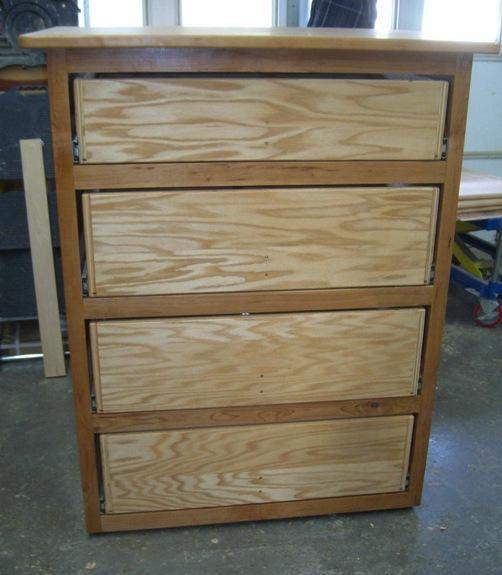
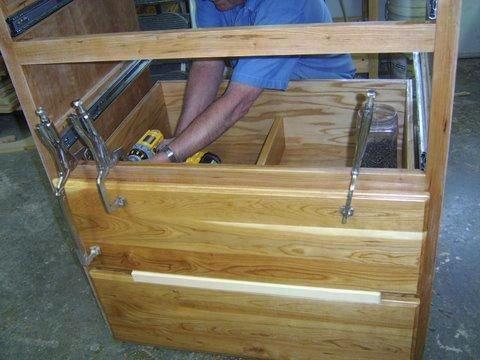
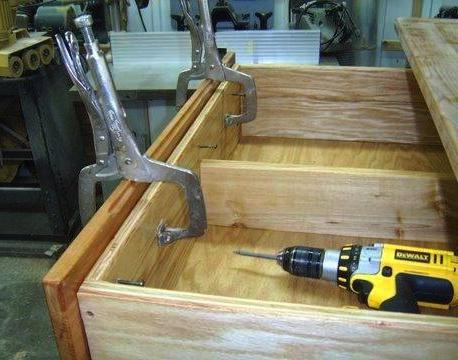
Step 5: Attach Drawer Slides - Select the Drawer Slides
- Select the Drawers, Chest, and Slides; Attach the slides to the drawers and the Chest
Glide Support Braces
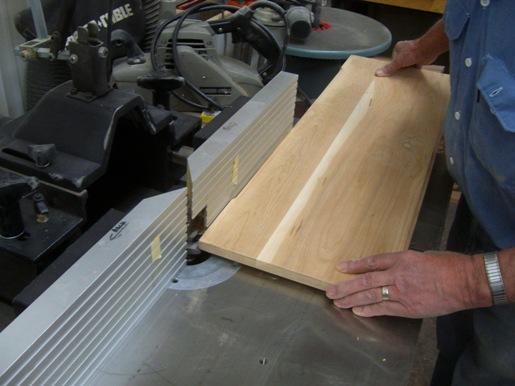
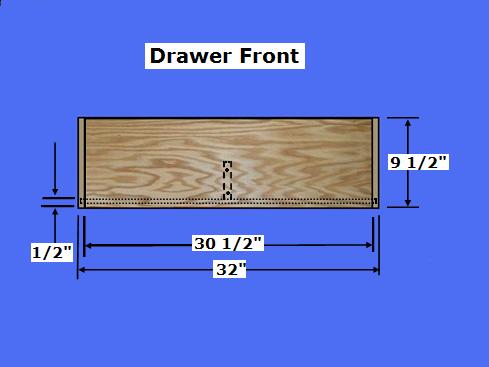
Step 6: Construct and Attach Drawer Fronts - Select the 12" Hardwood Material
- Select the 12" Hardwood Material; cut 3 bigger Drawer Faces @ 11" x 34"
- Select the 12" Hardwood Material; cut 1 smaller Drawer Face @ 8.5" x 34"
- Select the Drawer Faces; Using a router and bit of choice, router all edges
(include finger grabs); Sand all surfaces smooth
- Select the Drawer Faces, clamps and 1 1/4" screws; Center and clamp the Faces on the
Drawers; Pre-drill and attach with screws
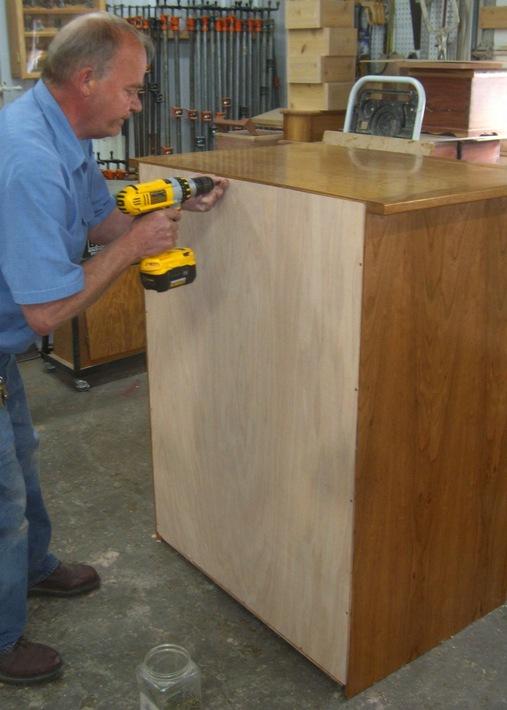
Step 7: Finish the Dresser - Select the Completed Dresser
- Select 1/4" Plywood; Cut the Back Panel @ 35 1/4" x 46 7/8"; Using 1/2" screws, attach
the panel
- Fill all holes and cracks with filler; Conduct a final sanding of all surfaces
- Apply three coats of poly


Copyright 2013 - Wayne Murray
If you are a member of a non-profit organization and have any requests or suggestions regarding projects
for your group, you can send Rod an email at: rodneyg@cheqnet.net
|