Materials
- Corbels (Optional): Two
- 1/2" CDX Plywood 48" x 96": One piece
- 1/2" Drywall (Greenboard for bathrooms), 48" x 96": One piece
- 1/4" Drywall (Greenboard NOT available @ 1/4"), 48" x 96": One piece for the "Curved Portion" of the Arch (Note: USG makes a "flexible panel" available at US Gypsum)
- 2 x 4 x 96": Three pieces for the Support Braces and Spacers
- 1 1/4" Wood Screws: 1/4 lb.
- 3" Wood Screws: 1/4 lb.
- Wall Anchors: Six pieces
- Plastic, Flexible Corner Bead: Two pieces
- 1" Drywall Screws: 1/8 lb.
- Drywall Paper Tape: 1 Roll
- Drywall Compound: Two Gallons
- Sandpaper
- Primer
- Paint
Tools
- Table Saw
- Tape Measure
- Pencil
- Chalkline
- Stud Finder
- Miter Saw
- Jig Saw
- Power Drill with DeWalt 9/64 Tapered Bit with Plug Cutter
- Razor Knife
- String
- Drywall T-Square
- Level
- Screw Gun
- Nail Gun w/1" Brads
- Two Gripping Clamps
Step 1: Cut The Support Pieces - Determine the desired size of your Arch or use the dimensions provided here
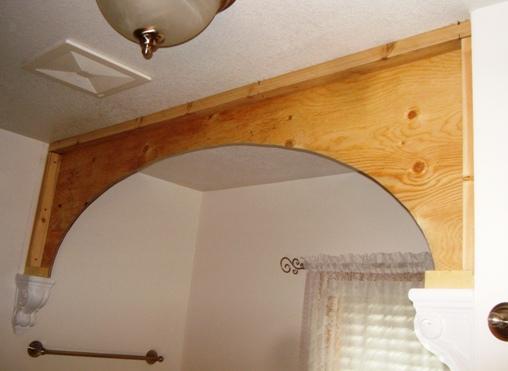
- Select the Corbels (Optional) and 2 x 4 Stock: Determine the desired thickness of the Arch; Allow for 1" of Plywood; Plus 1" of Drywall; Subtract the thickness of Corbel (4 1/4") = The required thickness of the 2 x 4's; Rip the three, 2 x 4's to 2 1/4" for the Support Braces
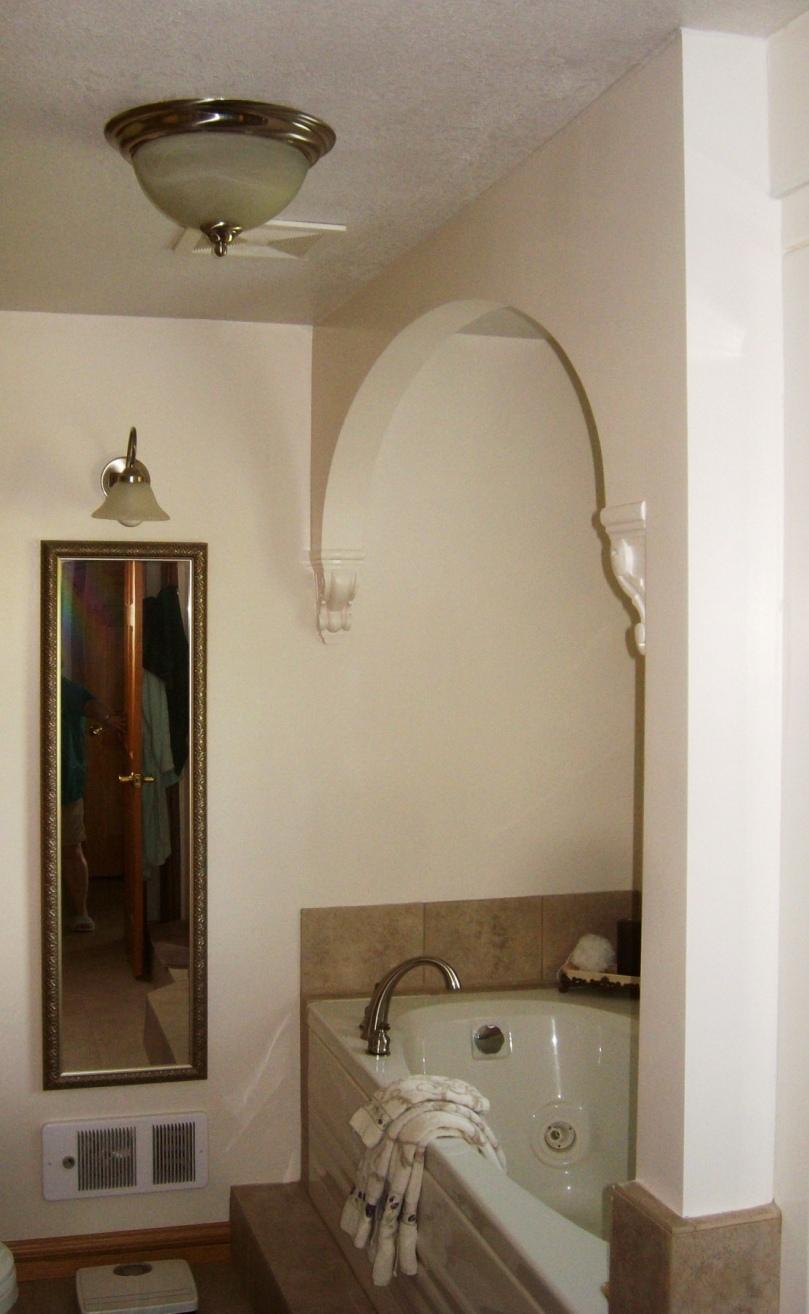
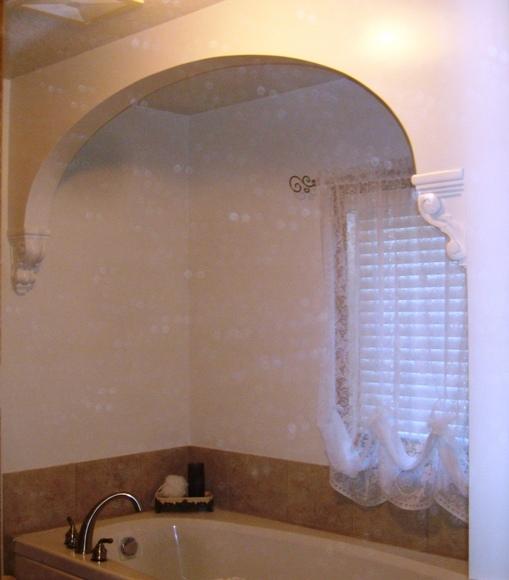
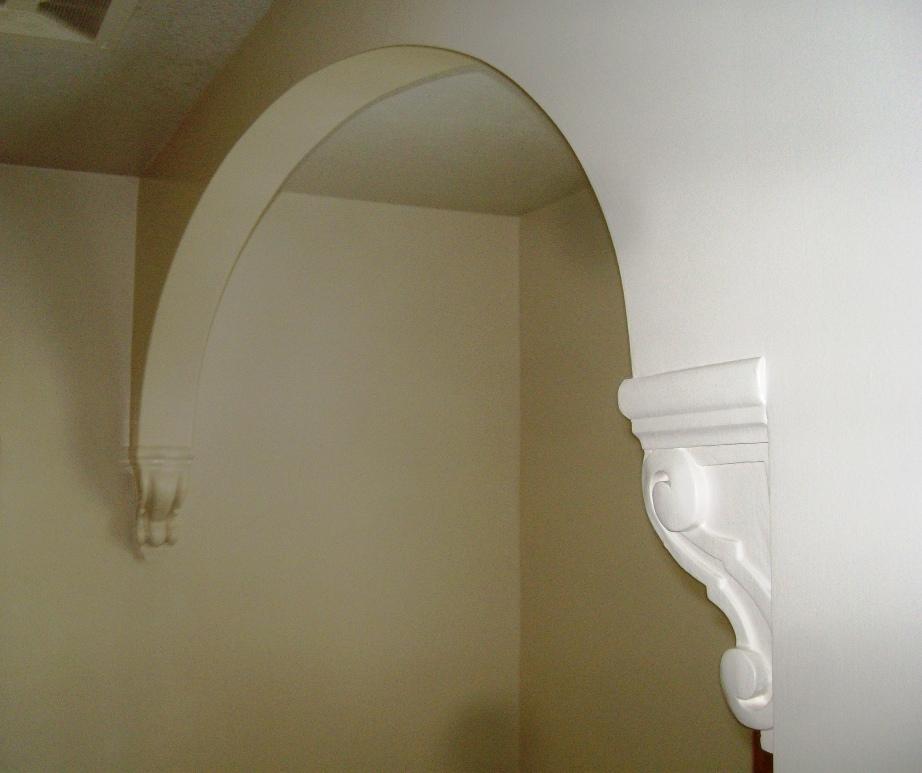
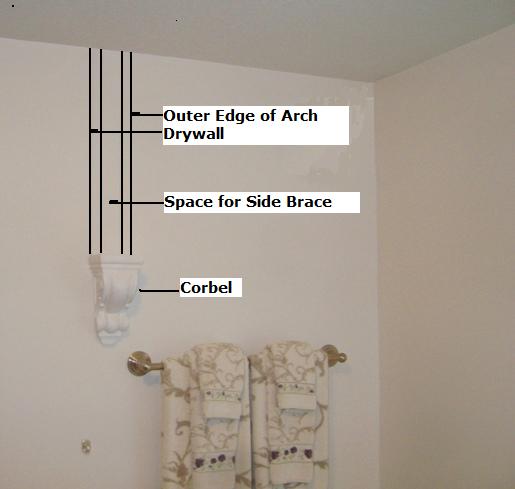
- Determine the placement of the Corbels/Arch; Measure out from the wall; Measure down from ceiling to top/interior edge of the Corbel (Optional); Install Corbels
- Using a Pencil and Level, mark both Side Walls up from edges of the Corbels
- Using a Ruler, measure and mark 1" in from each edge line to indicate the edges/placement of the 2 (1 1/2") x 2 1/4" Support Braces
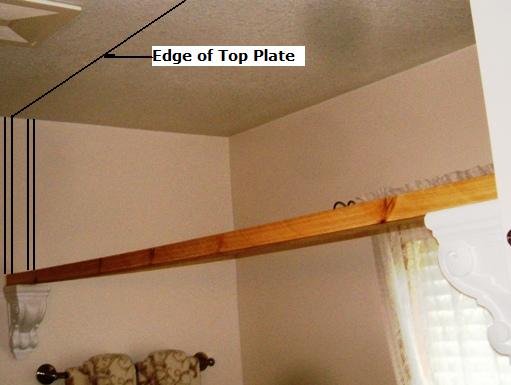
- Using a Chalkline, snap a line to indicate the leading edge of the Top Support Brace
- Using a Stud Finder, locate the Rafters/Trusses along the Chalk Line and indicate them with a pencil mark (If the Arch is not running perpandicular to the Rafters, use Wall Anchors to attach the Top Plate)
- Select the 2 x 2 1/4" Material; Measure and cut the Top Support Brace; Using the Chalk Line as a reference, and 3" Screws, attach the Top Brace to the ceiling, as shown above
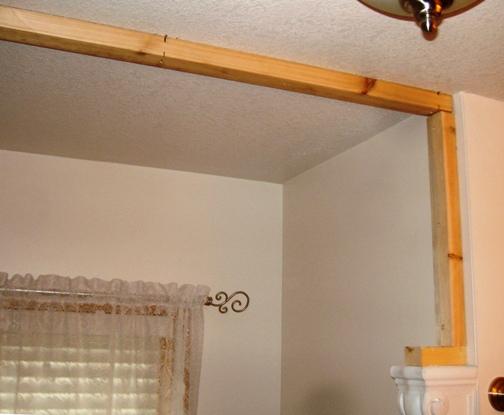
- Select the 2 x 2 1/4" Material; Measure and cut the Side Support Braces; Using Wall Anchors, if necessary, attach the two Side Braces
Step 2: Make the Arch - Select the Plywood Material
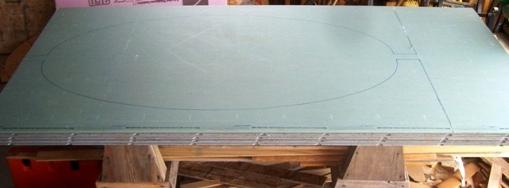
- Select the 1/2" Plywood; Measure and mark the height and width of the Arch space; cut the rectangle; Dryfit and adjust the rectangle for height and width
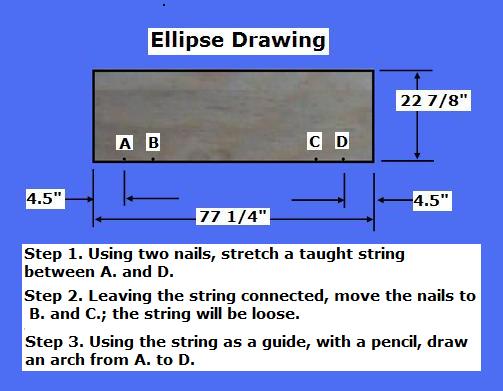
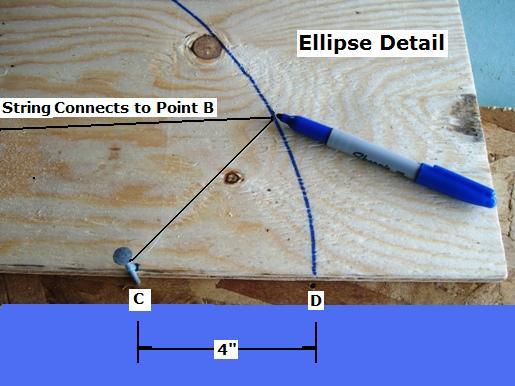
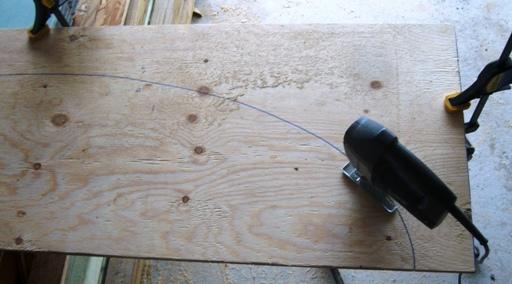
- Select the rectangle; Using a String, two Nails/Screws, a Pencil, mark/cut an Arch Template, as shown above; Dryfit
- Select the Plywood Arch; Using the Arch, mark and cut the second Plywood Arch piece
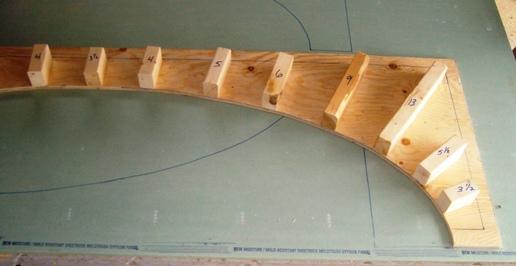
- Select one Plywood Arch Piece; Clamp it into place; Using a Pencil, mark the outline of all the Support Braces
- Select one Plywood Arch Piece and the Drywall material; Using the Plywood Arch as a template, draw two Arches on the Drywall

Step 3: Assemble the Arch Pieces - Select the 2 x 2 1/4" Material
- Select the 2 x 2 1/4" Material; Cut the Spacers to length, as shown above
- Select one Plywood Arch with the outline of the Support Braces (Arch Panel A) and the Spacers; Allign the Spacers flush with the Arch edge about six inches apart (ensure that the Spacers remain a minimum of 1/4" from the Support Braces "pencil line")
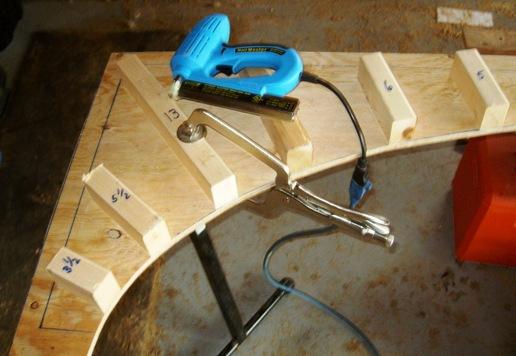
- Using a Clamp and a Nail Gun, attach the Spacers to one side of the Plywood Arch (Shoot the nails from below; through the Plywood into the Spacers)
- Select the Plywood Arch w/o the Spacers (Arch Panel B); Using 1" screws, attach it to one side of the Support Braces
- Select the Plywood Arch with the Spacers, Arch Panel A; Using 1" screws, attach it to the other side of the Support Braces; Also, secure Arch Panel B to the Spacers
Step 4: Complete the Arch - Select the Drywall/Green Board
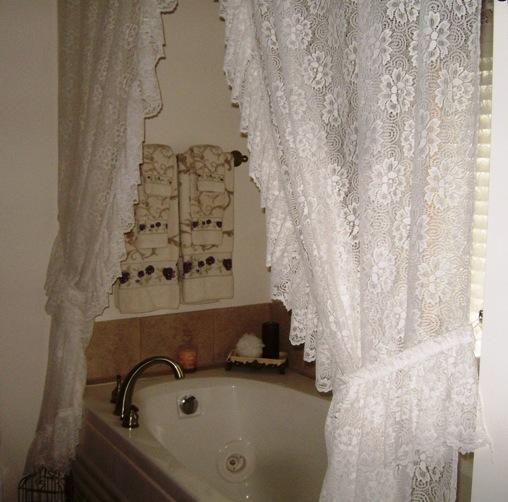
- To finish the Arch, cut and attach the Drywall and Corner Bead as shown on drywallinfo.com


Copyright 2013 - Wayne Murray
If you are a member of a non-profit organization and have any requests or suggestions regarding projects for your group, you can send Rod an email at: rodneyg@cheqnet.net
|