Materials
- 1" (7/8") x 6" x 30" Pine (or wood of choice): One Piece for the Front, Back, and two Sides
- 1" x 10" x 24" Pine (or wood of choice): One piece for the Top and Bottom Panels
- 1" x 1" x 24" Red Cedar (or other Hard Wood Material of choice): One piece for the four, Corner Posts
- 1 1/2" Wood Screws: 1/8 lb.
- Two, 90 Degree Stop Hinges
- One Hasp
- 3/8" Wood Plugs: 16
- Sandpaper
- Wood Filler and Glue
- Satin Finish Polyurethane Poly
Tools:
- Table Saw
- Belt Sander or 120 grit sandpaper and a block (220 grit for finish sanding)
- Tape Measure and/or Sliding Ruler
- Pencil
- Miter Saw
- Power Drill with DeWalt 9/64 Tapered Bit with Plug Cutter
- Router with Round-over Bit
- Screw Gun
- Two Clamps: One, Bar Clamp and a Gripping Clamp
- Hammer
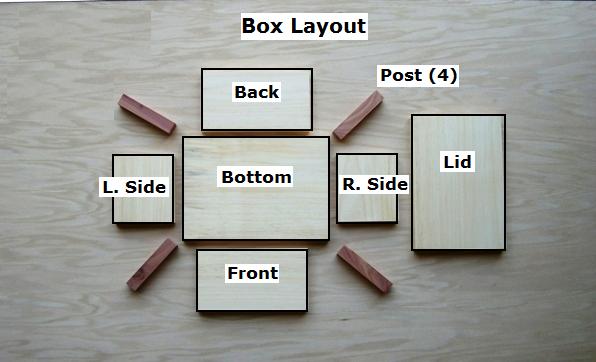

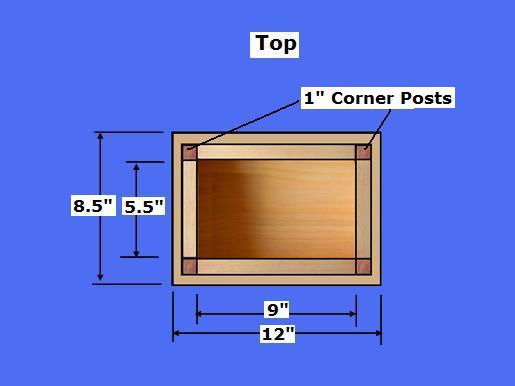
Step 1: Cut the Box Pieces - Determine the desired size of your box or use the dimensions provided here
- Select the 1" x 6" stock: Rip it to 5"; Crosscut the Front, Back, and Side Panels, as shown above
- Select the 1" x 10" stock: Cut one piece @ 8.5" x 12" for the Bottom Panel; Cut another piece @ 7.5" x 11" for the Top Lid; Use a round-over router bit to round the "TOP" edges of the Top and Bottom Panels
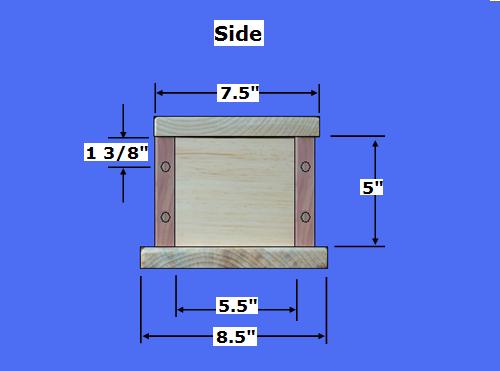
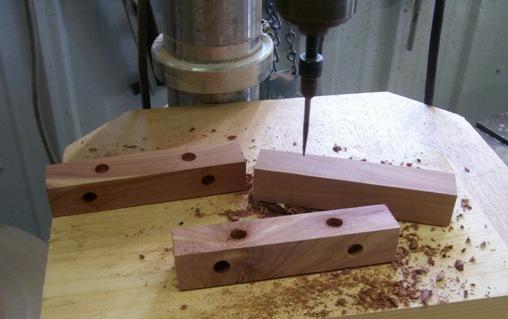
- Select the 1" Red Cedar Material; cut four pieces @ 1" x 1" x 5" for the Corner Posts; Use the suggested drill bit to drill/counter-sink the four holes in each post, as shown above (Note: The Front and Back Surfaces are drilled 1" from each edge; the Side Surfaces are drilled 1 3/8" from each edge)

Step 2: Assemble the Box Pieces - Select the Front, Back, Sides, Posts and the Bottom Panels
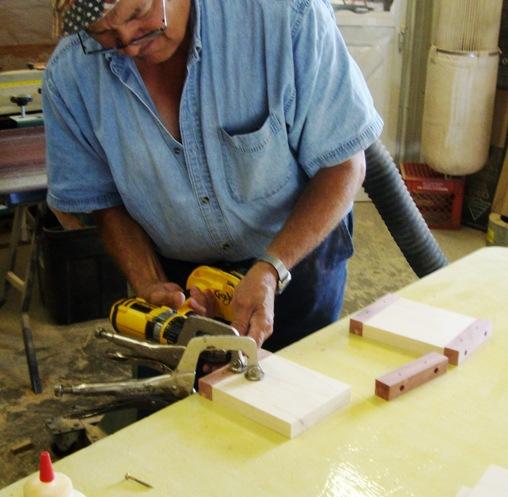
- Select the two Side Panels and Corner Posts; Attach the Sides to the Posts with glue and screws (two Posts per side) (Note: Position the holes so that you will be driving the screws into the holes that are 1" from each edge); use clamps to keep all edges flush and tight while the screws are driven in
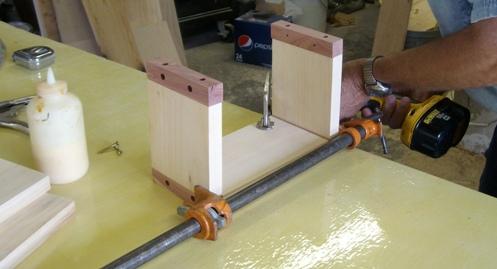
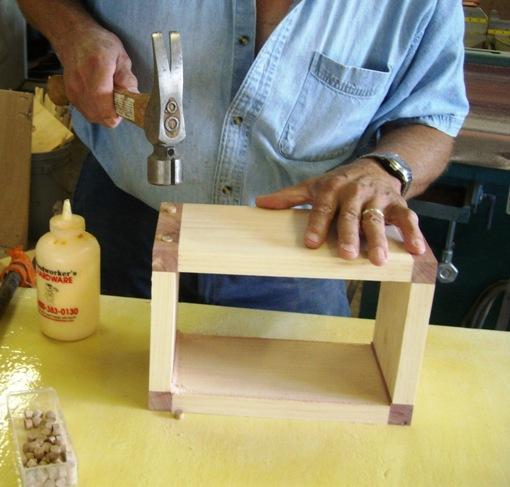
- Select Front, Back, and two Side Assemblies; Attach the Front and Back Panels to the Corner Posts with glue and screws; Use clamps, as shown above, to ensure all edges are flush
- Select the Front, Back, and Side Assembly; Using a dab of glue and a hammer, insert the 3/8" Plugs and sand them flush with all surfaces
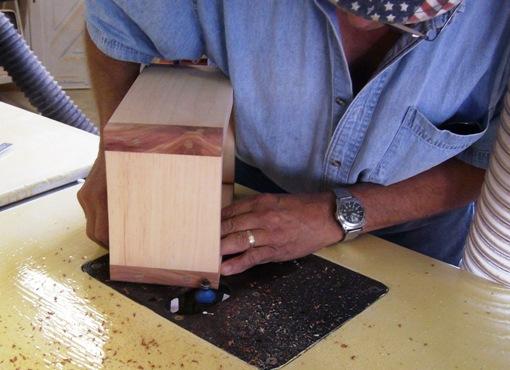
- Using a Router with a Round-over bit, round all corners (DO NOT router the top or bottom edges of this assembly)
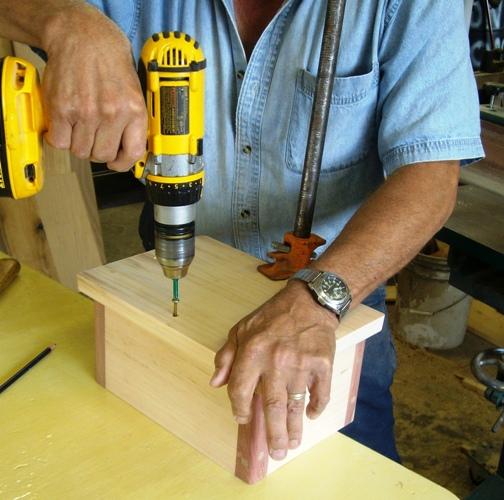
- Select the Bottom Panel; with glue and screws, center and attach the Bottom Panel from the bottom, as show above
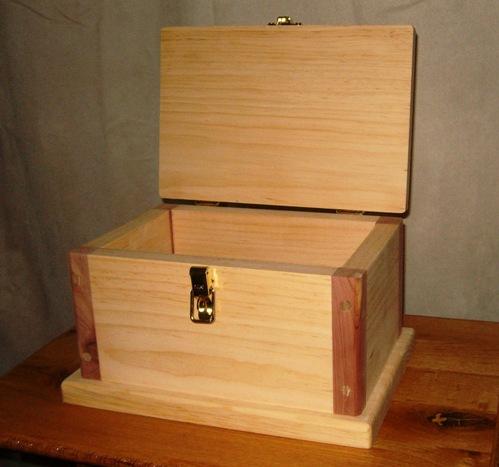
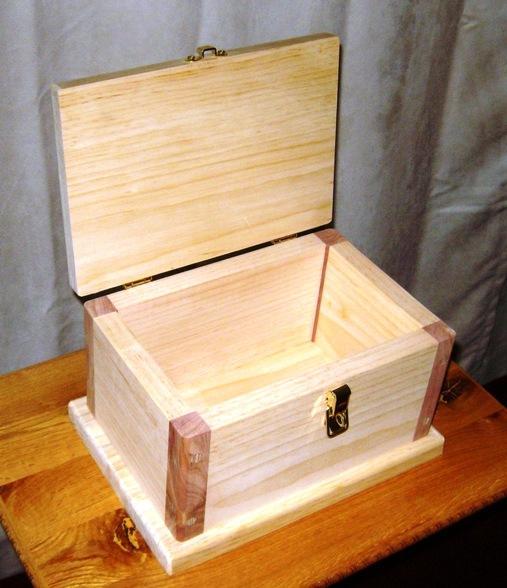
Step 3: Attach the Lid - Select the Lid Piece, Hinges, and Hasp
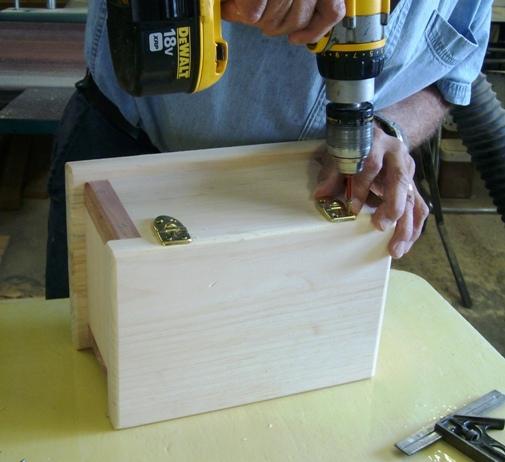
- Select the Lid and Hinges; Attach the Hinges to the Lid and Box, 1 3/4" from each edge
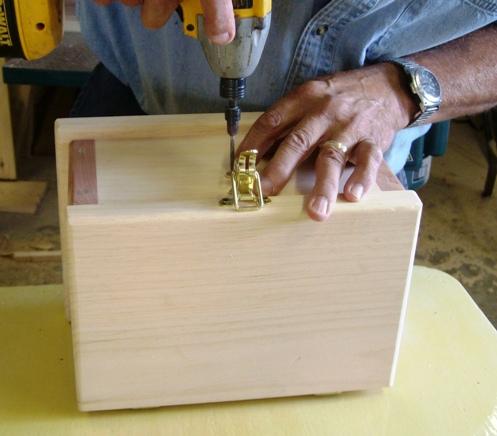
- Select the Hasp; First, center and attach the "Lid portion" of the Hasp; Attach the Lower part of the Hasp, as shown above
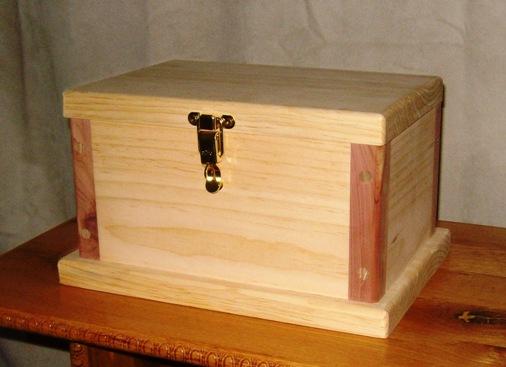
Step 4: Finish the Box - Select the Completed Box
- Fill all holes and cracks with filler; Remove all hardware and conduct a final sanding of all surfaces
- Apply poly and re-apply the Hinges and Hasp


Copyright 2013 - Wayne Murray
If you are a member of a non-profit organization and have any requests or suggestions regarding projects for your group, you can send Rod an email at: rodneyg@cheqnet.net
|